Usually I’m a big fan of snow in winter, it’s a rare thing to have this insulating protection last all winter here in SE Michigan. This winter however, we were into January before any significant amount of snow even arrived, to do the garden any good.
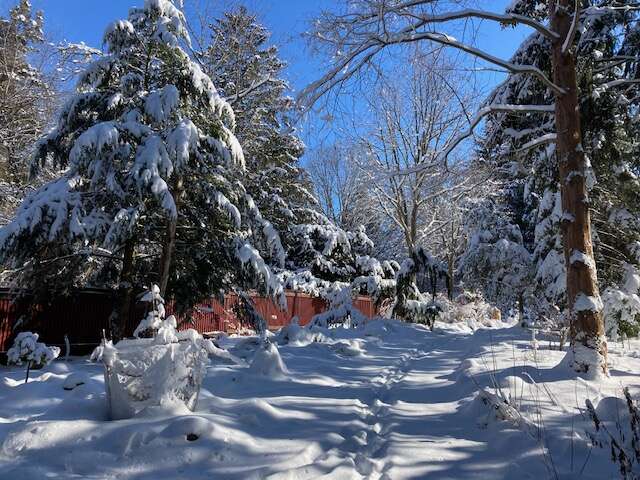
But this past week’s storm was a bit of a curve-ball. The rain that started to fall Tuesday evening was forecasted to change over to snow around 4:00 am Wednesday morning, but that transition didn’t start until 8:00 – 8:30, even then the snowflakes that did fall was rather small in size and heavy with water judging from the velocity they fell with.
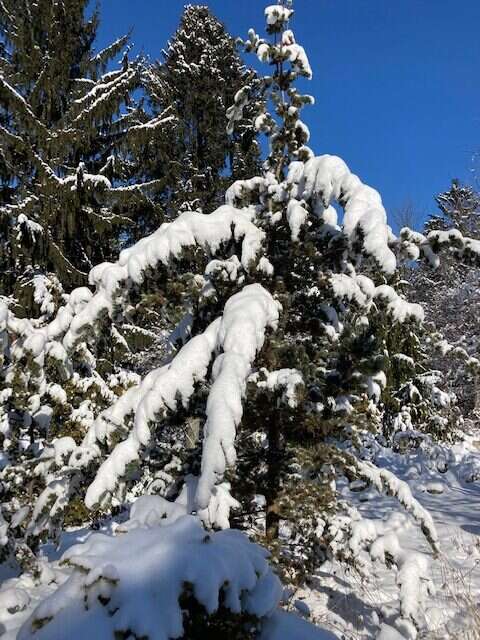
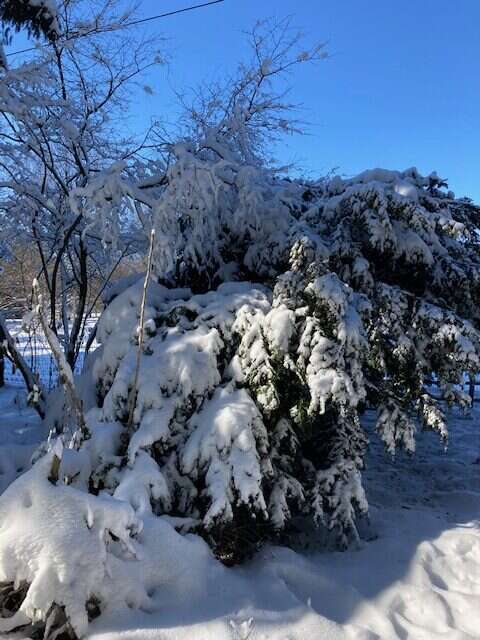
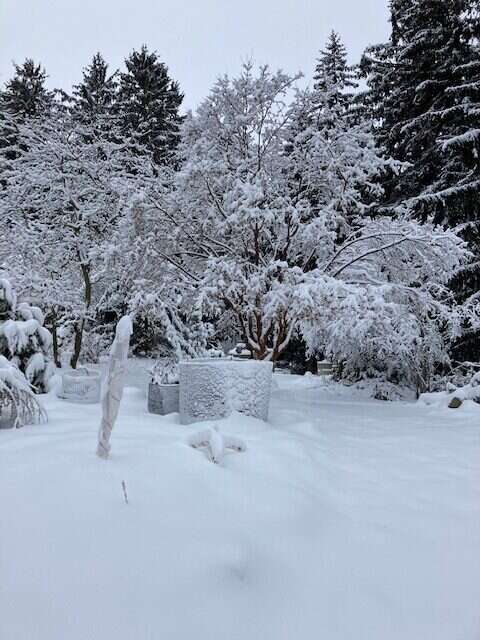
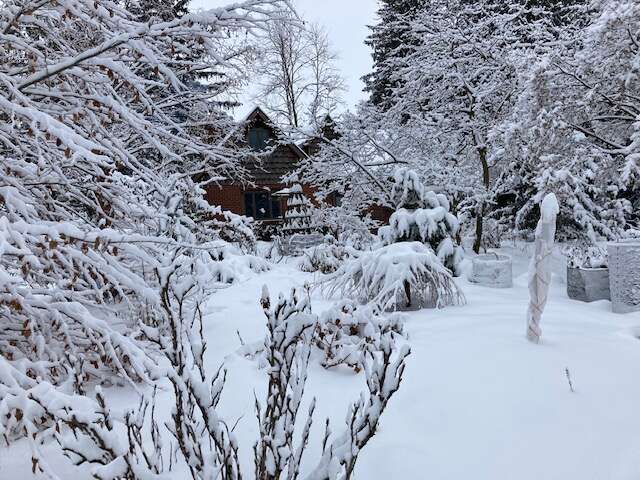
The falling snow seemed to have sopped-up all of the water and transferred it to the snow that followed. The snow load just continued to build.Wednesday afternoon (after my second round of shoveling snow), I went around the garden to try and shake off the accumulated snow using my well-worn snow broom, alas by then the snow had frozen to all of the foliage.The overnight, single-digit cold didn’t help matters.Several deciduous trees had not escaped the same fate.On and on the snow came, thru Wednesday night and continued on for most of Thursday. Both Friday and Saturday mornings found more snow had fallen overnight. So for now least, nothing’s to be done…but to wait for the sun,To come and work it’s magic, and melt this all away.Here’s to the coming week of warmer weather!
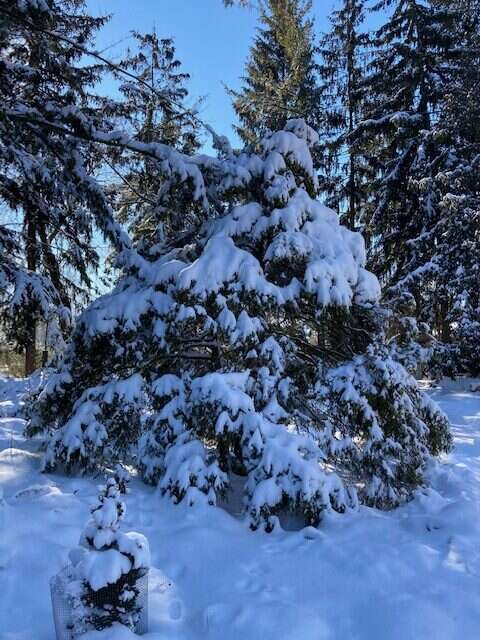
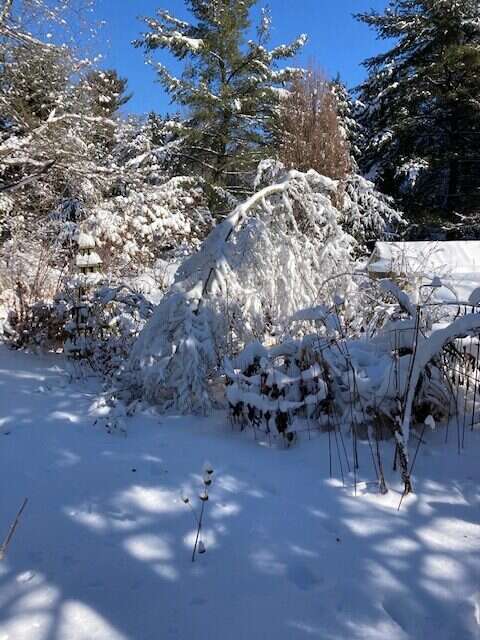
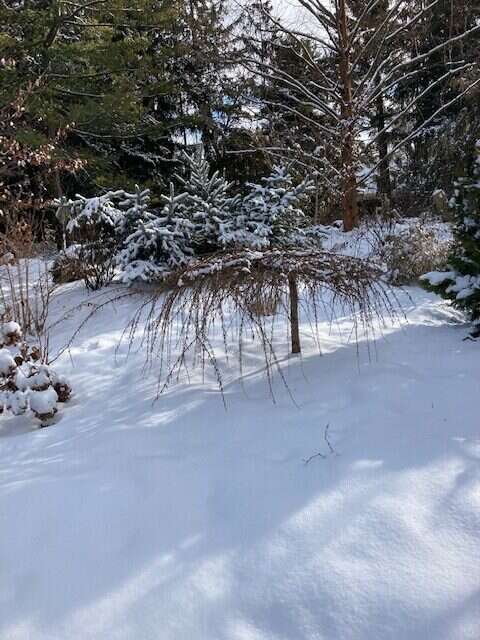
P.S. Funny how most of the pendulous Conifers
seemed to handle this event,without a care,As if they were bred just for it!
Yesterday’s daylong snow brought a substantial amount of moisture to the garden, however it could certainly have been worse. The precipitation (rain) which started on Tuesday evening, was forecasted to change over to snow sometime in the early morning hours. That transformation didn’t occur until 8-8:30 Wednesday morning. By sometime close to 12 noon, I went out to make the first pass with the snow shovel as there was about 3” on the ground (the bottom inch of which was a very heavy slush). By 5:00 pm another 2-3 inches of snow had accumulated and it was time to go out and shovel again.
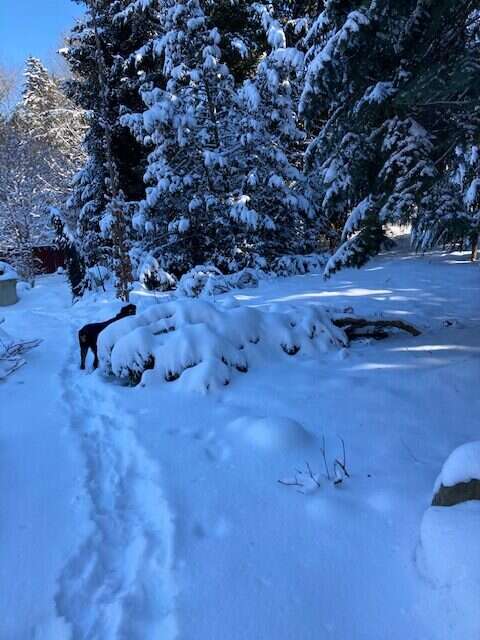
This morning, after my breakfast it was time to head back out to clear away the snow that fell overnight (there was another 2-3” of new snow to move), and get all of the bird feeders topped off.
By clearing away the snow on the first pass yesterday, the exposed ground had frozen, making this mornings shoveling a lot easier.
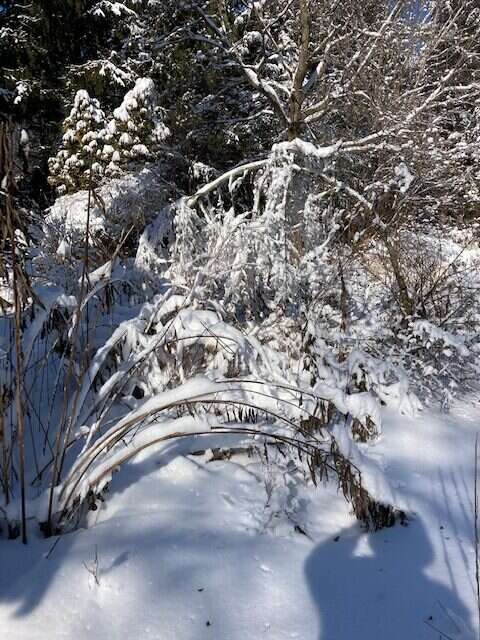
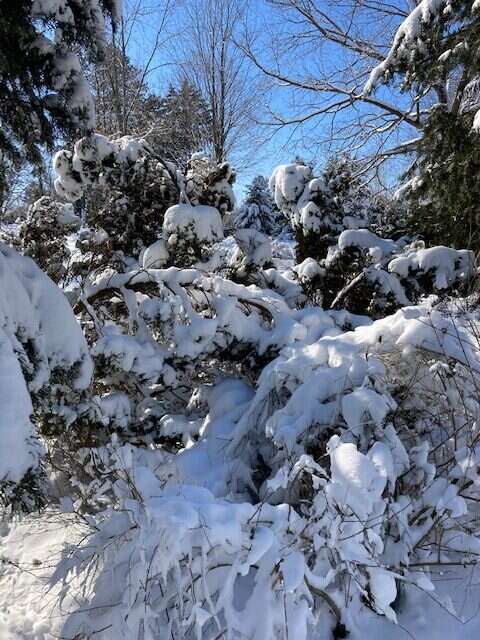
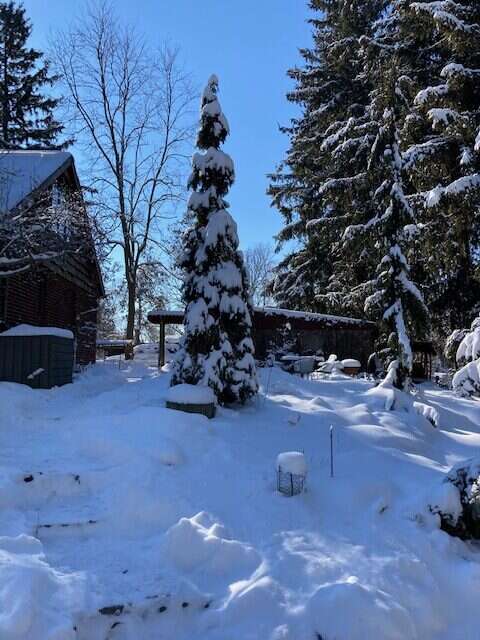
It was obvious that a lot of the woody plants were in need of getting the heavy snow shaken off them, their branches were bending to the breaking point.
The ditch, down in the lower garden, holding about 2ft of water.
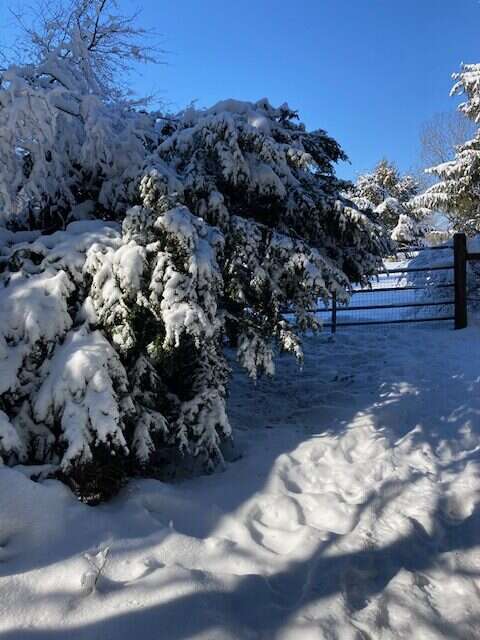
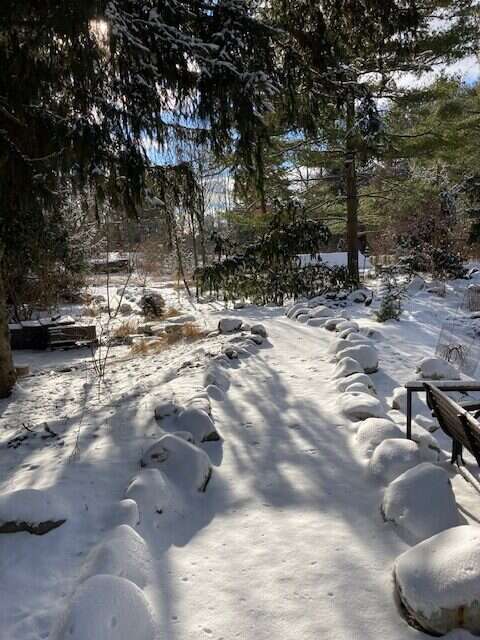
Many of the older conifers have branches that are too dense to clear the snow from, they will simply have to wait for the snow to evaporate or melt away.
Despite all of the snow load I’d only found 2 branches that had snapped due to the excess weight.
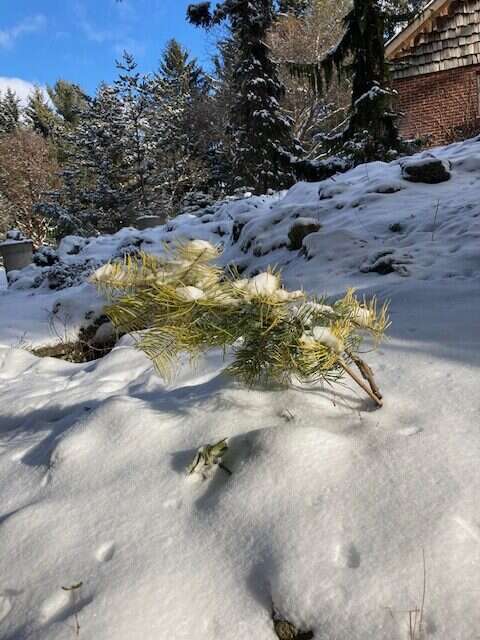
I’m not sure what to make of this one. This Thuja is not a weeping cultivar, and it doesn’t appear to have snapped. But I am not going to risk trying to raise it up right now. It may require removal next summer if I cannot straighten it up enough. Today’s forecast is for another inch or so of snow, and a low of 9 degrees!
The rest of my day will be spent tending the fire and looking out the windows!
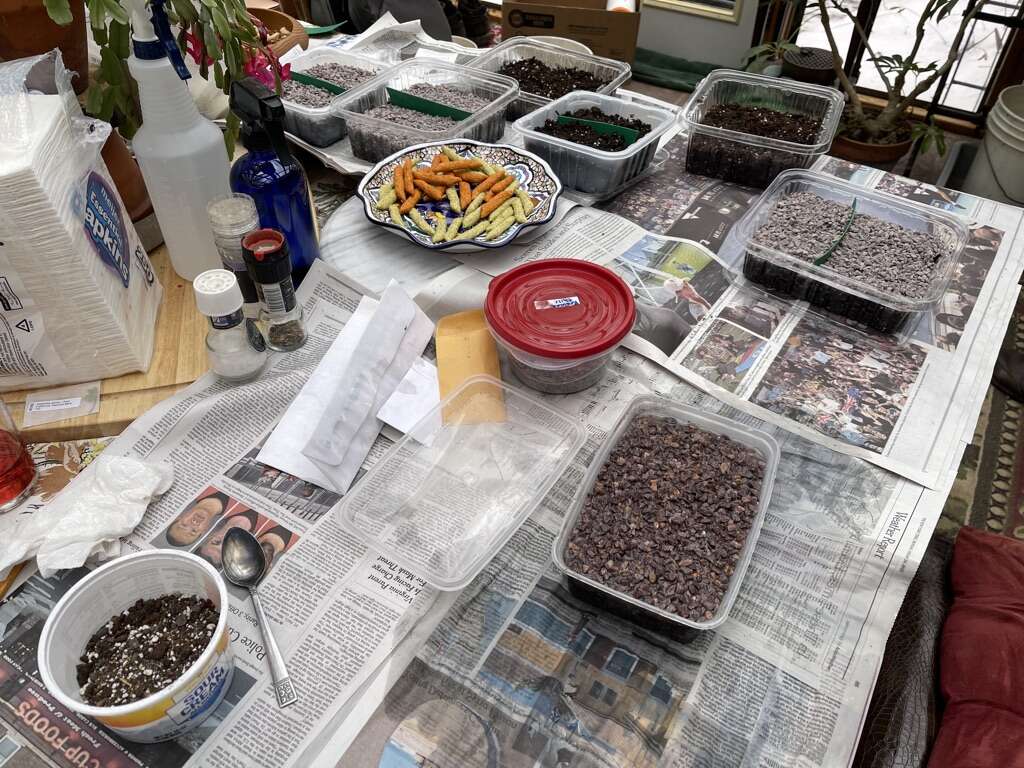
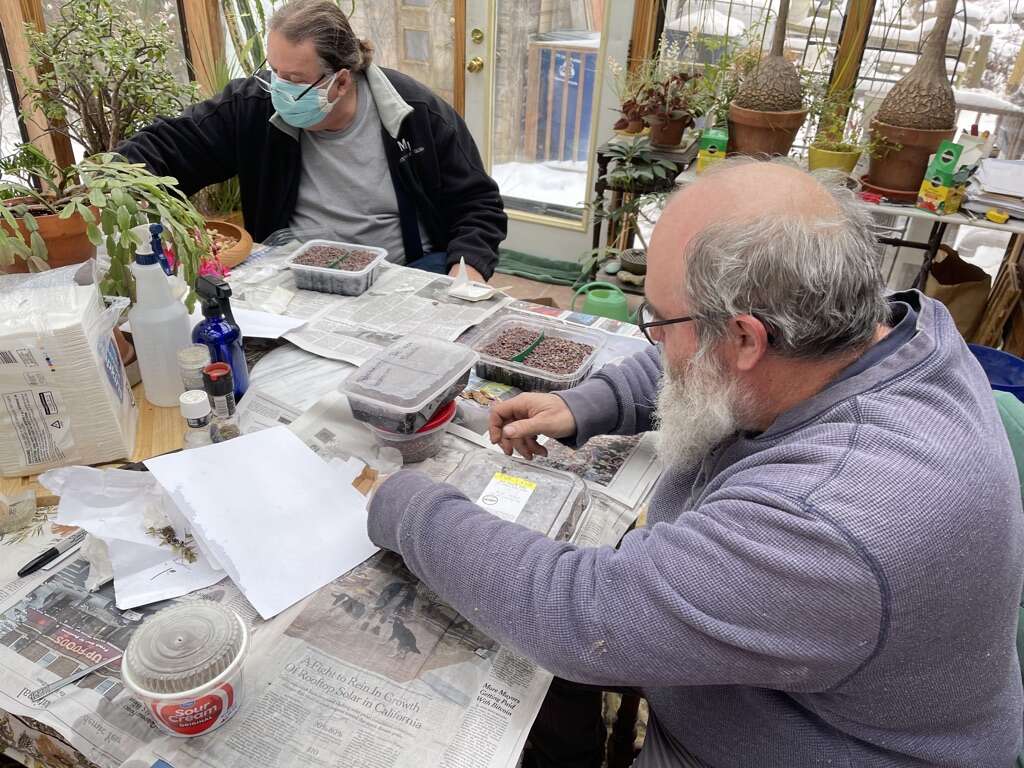
It’s late January, too cold outside for doing much in the garden except for keeping the bird feeders topped off and looping the dogs around the property. Several weeks ago my buddy Don La Fond and I were having an extended telephone conversation. One of the topics was the impending arrival of our NARGS seed orders, the discussion evolved to old (as yet unsown) seed, and from there, to a growing collection of fern spore packets. I have been amassing a smallish assortment of dried, fern-leaf sections that I’d either gotten thru the annual NARGS Seed Ex., or else from ferns that I’d come across growing in the wild. All of these bits of botanical “promises” were stored in glassine envelopes some of which dated back to the mid 2000’s. Don had a couple of his own fern packets, and we agreed we should check with Tony (Reznicek), to see if there was a time when the 3 of us could get together and make an afternoon of sowing fern spores, and that happened yesterday.
With Tony house being the halfway point and his sun-room an ideal venue for our project, we joined forces there. Each of us had brought our own planting containers.
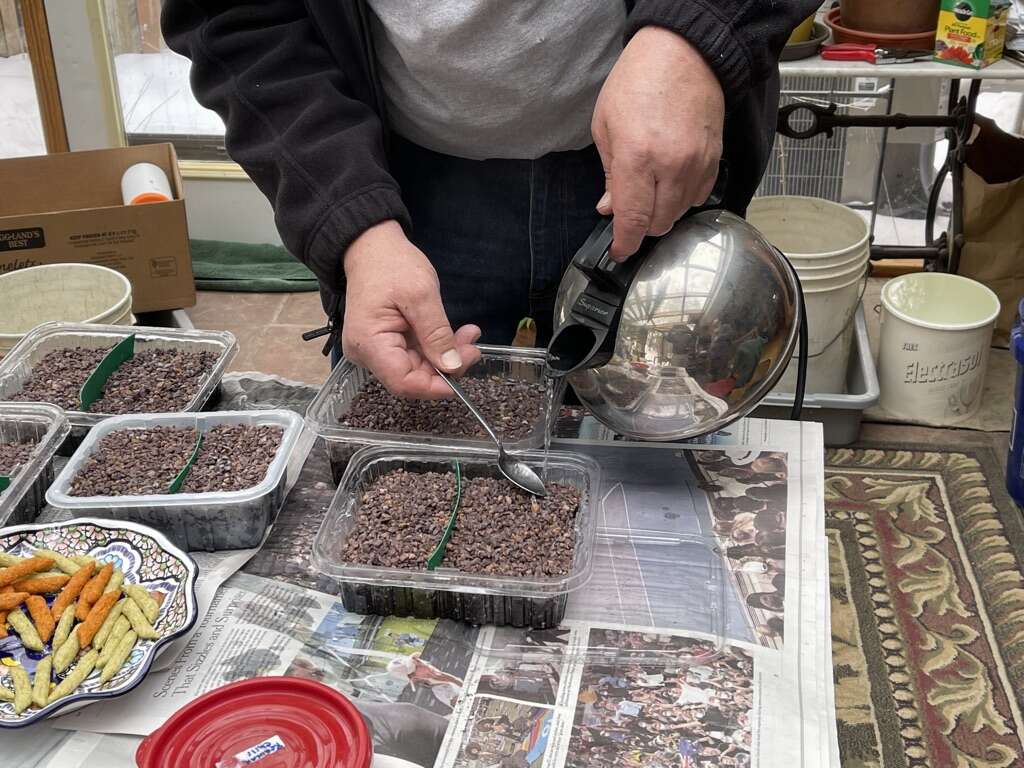
We added 2-2.5” of wetted, commercial potting mix into each container, lightly firmed down and leveled, and then top dressed with #3 crushed granite grit.
.
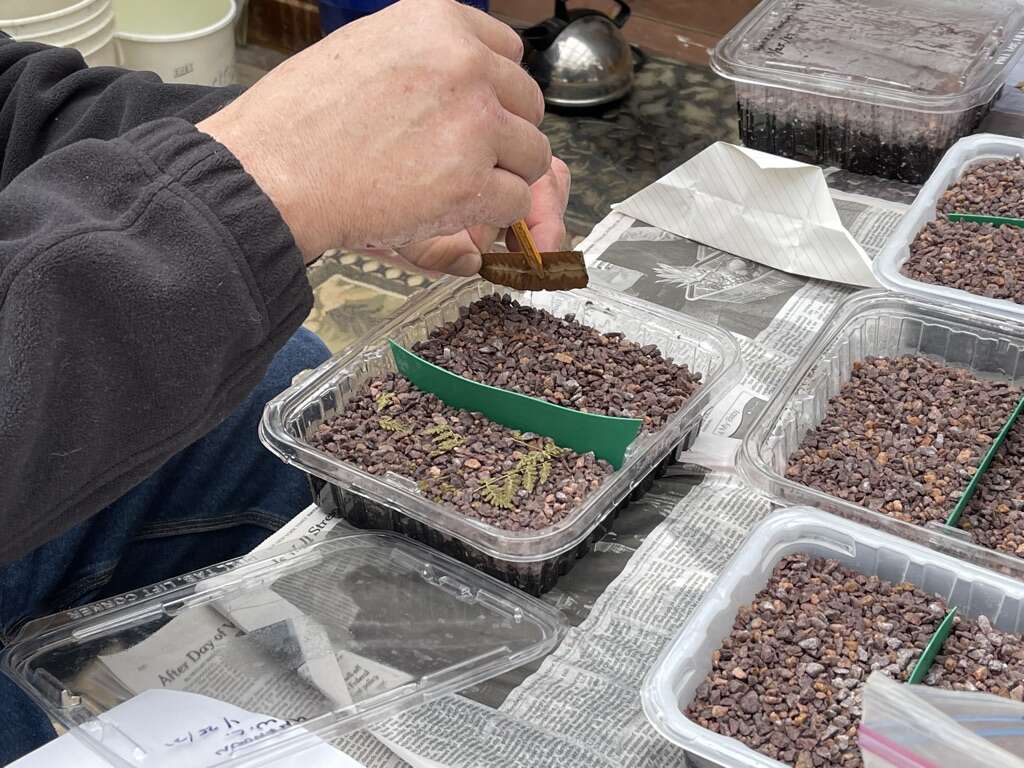
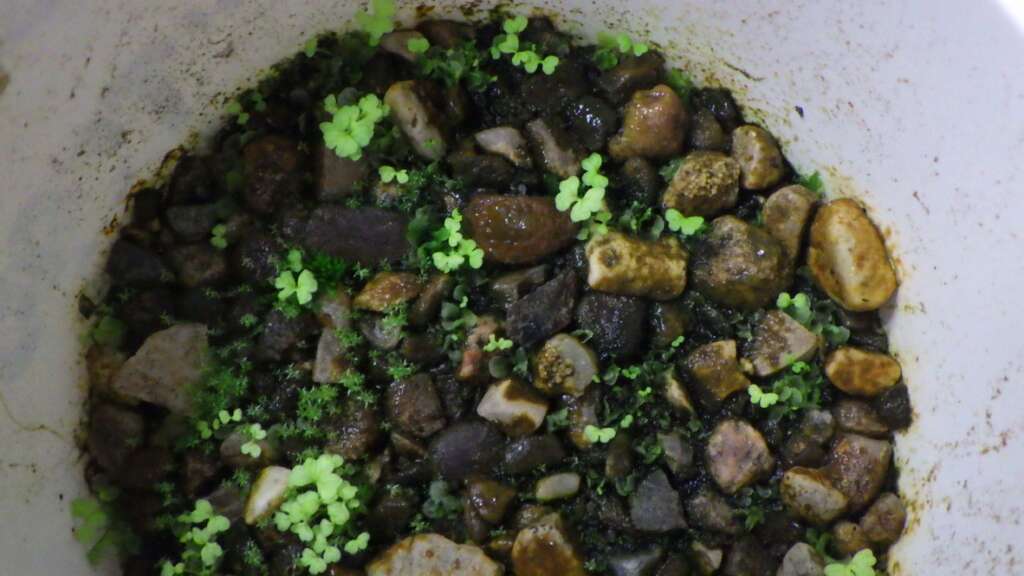
Tony had brought up the container (pictured above) that he’d sown spores into several weeks ago, of a Glade fern. The pale green, multi leafed plants are the growing Sporephytes. They will grow on into young ferns. The darker green, almost liverwort-looking plant growths (seen in the central area of the picture) are the mature prothallia or gametophytes, from which the gametes are released. Or this is my best understanding of the process. There is a good bit of moss growing in the container as well, but Tony says that at this stage, the soon-to-be young ferns, will be able to outpace the moss until it’s time to pot the ferns up individually. All in all it was great to have a short get together and get a quickie chlophyll-fix in Tony’s sunroom!
Seed orders are coming in, so I thought I would post something about the method I use for sowing seed that can take several years in order to reach a size that is sufficient to pot-on.
Years ago I utilized large seed frames with 4ft x 4ft x18” cells set into the ground. The extreme size of those cells, allowed me to get away with paying little of the attention that one has to devote to individual pots. I rarely had to water, and if need be I could leave the seed or seedlings be for several years. However, I found all that bending over to be exceedingly tiresome. For me the Ah-ha moment came when I spotted some Bus-Boy trays for sale. I haven’t come across a better container for sowing seeds into that have an extended or multi-staged germination period, as is often required with Paeonia or Trillium seed, and I also use them for sowing tree seeds, in addition to seeds gathered from the cones of Witches Brooms. These Bus-Boy trays are well suited for sowing large batches of seed, such as the 300 – 400 seeds one gets from a single Arisaema sikokianum fruiting head. What follows is a method that I have used for over a decade to transform these readily available, and durable, plastic bins into miniature seed frames. They large enough to withstand the rapid drying out that smaller pots experience, and yet portable enough to pick up and carry over to a table, so no more bending over to inspect or weed. Being easy to make and requiring few tools is also a big plus. Here’s what you’ll need.
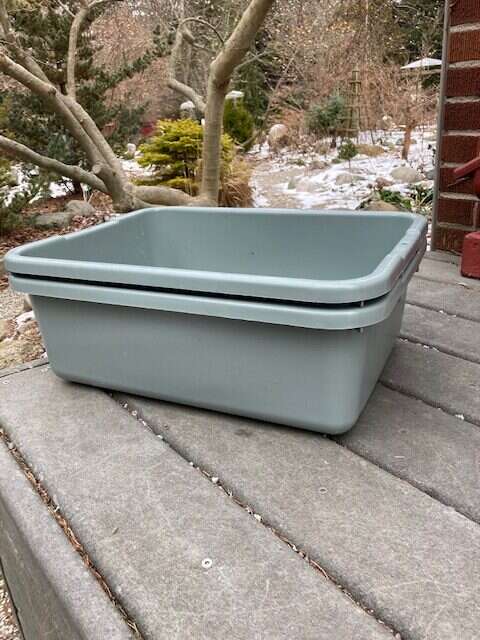
The warehouse store we frequent sells Bus-Boxes in 2-packs.
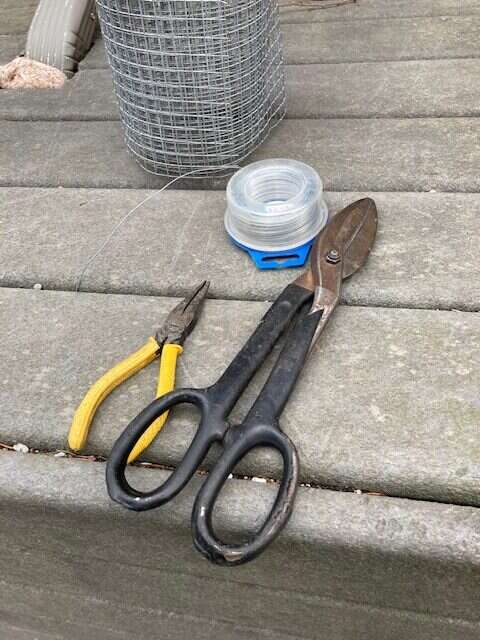
Some galvanized hardware cloth (aka wire mesh). I prefer the 1/2” square as apposed to the 1/4”. Some fine gauge galvanized wire (I like 20 gauge as it’s pliable yet strong). Some sort of wire-cutters or tin-snips Needle-nosed pliers. Drill & smallish bit
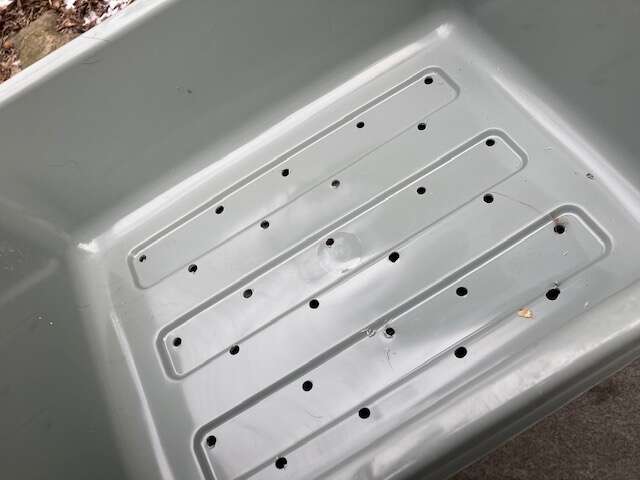
I start off by drilling a bunch of drainage holes.
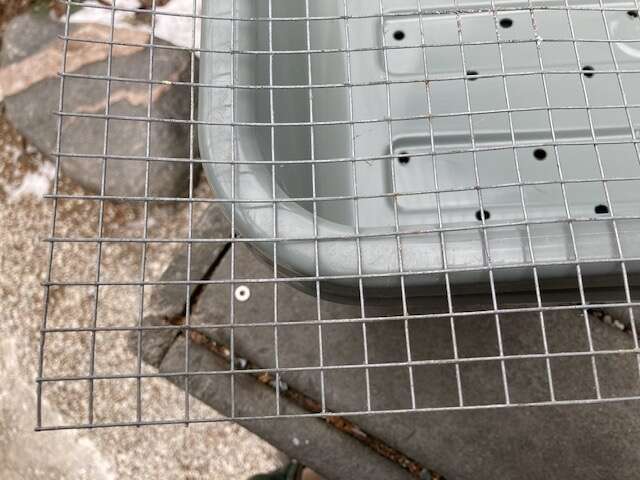
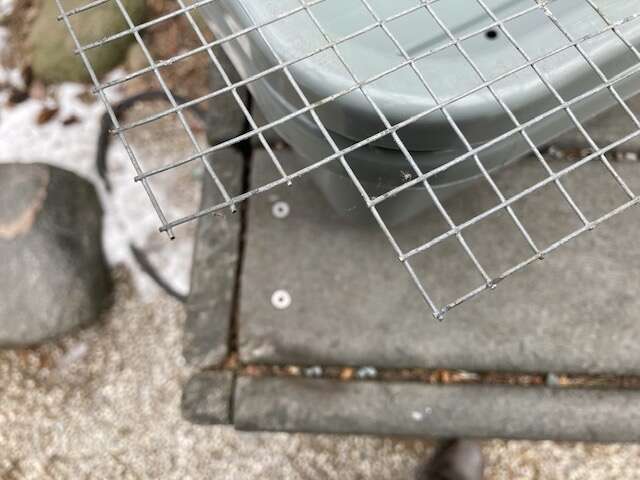
Then unroll the enough hardware cloth so that it extends beyond each edge of the tray by 3 mesh squares, and cut it off from the roll.
Remove each corner of the wire mesh, 3 squares x 3 squares. When all four corners are cut, fold down each side of the wire mesh by, firmly and evenly, pressing the mesh over each side of the tray. Then cut a 5-6” length of wire from the wire spool, and using the needle-nosed pliers, “stitch” the folded-over sides together.
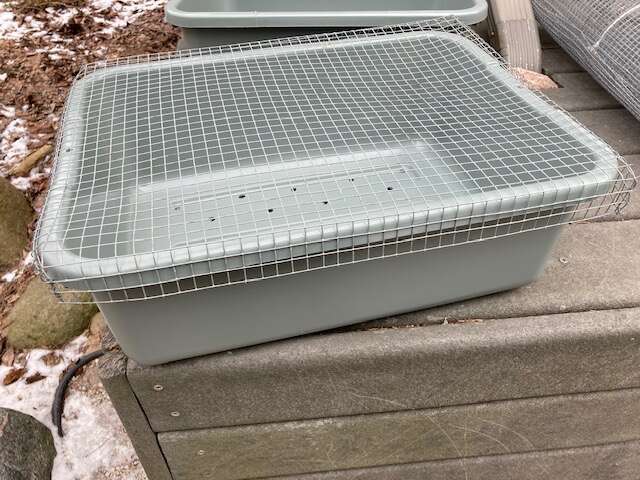
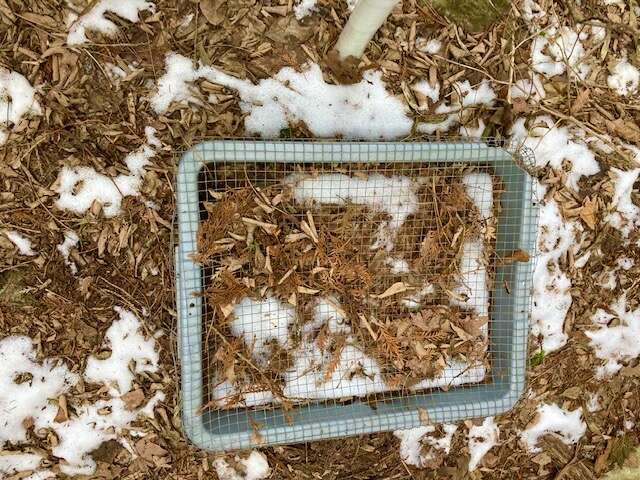
The finished project should look something like this. A tight fitting but removable lid that will allow rain and snow in, while keeping birds, cats, and all manner of rodents out! Now you are ready to fill your mini seed frame. Remove the lid and fill the tray with whatever mix is suitable for the plants you are going to grow. I fill the trays to within about 1.5” below the top edge of the trays, as the mix will settle over time. Sow the seed, cover with grit, water, and then find an out of the way place to leave the trays outside, where they’ll get rain and snow, as well as bright (but not direct sunlight), and pretty much forget about them. By late Spring or early Summer, if germination has occurred, I’ll remove the lids (if the expanding foliage gets close to reaching the screen). If not, I may not check them again for another week or two.
So long as the trays are not exposed to direct sunlight, I find they last for 5 or 6 years (outside), before they become brittle and break, so I get roughly two 3-year cycles of use from each tray.