Sowing Fern Spores

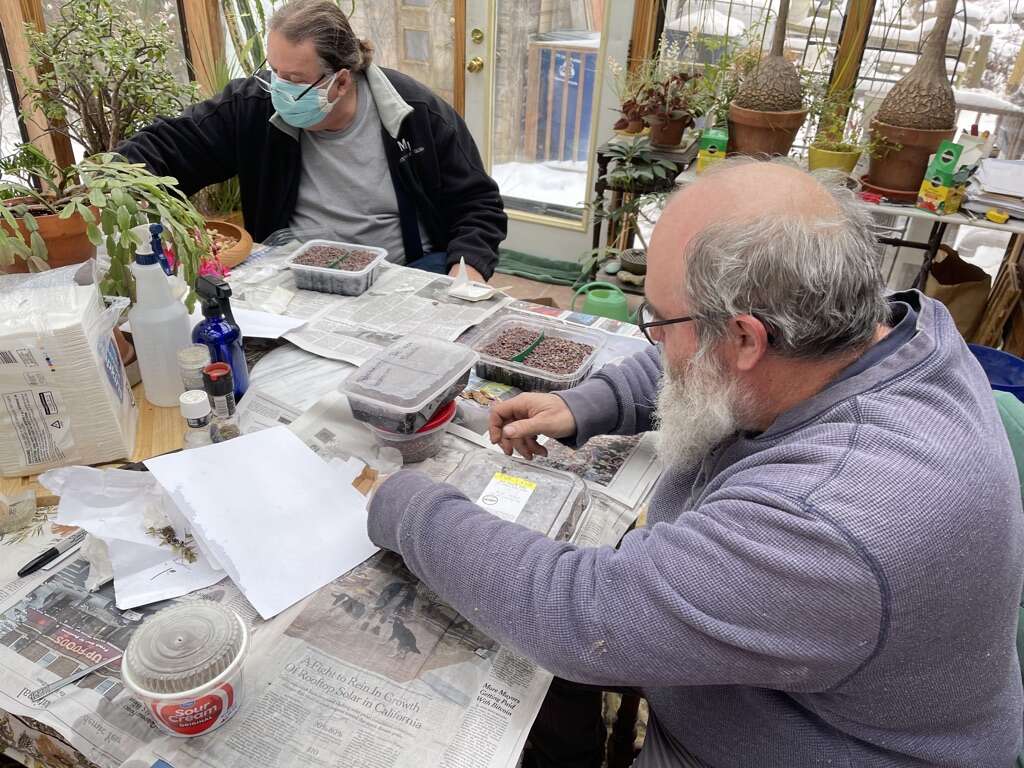
It’s late January, too cold outside for doing much in the garden except for keeping the bird feeders topped off and looping the dogs around the property. Several weeks ago my buddy Don La Fond and I were having an extended telephone conversation.  One of the topics was the impending arrival of our NARGS seed orders, the discussion evolved to old (as yet unsown) seed, and from there, to a growing collection of fern spore packets. 
I have been amassing a smallish assortment of  dried, fern-leaf sections that I’d either gotten thru the annual NARGS  Seed Ex., or else from ferns that I’d come across growing in the wild.  All of these bits of botanical “promises” were stored in glassine envelopes some of which dated back to the mid 2000’s. 
Don had a couple of his own fern packets, and we agreed we should check with Tony (Reznicek), to see if there was a time when the 3 of us could get together and make an afternoon of sowing fern spores, and that happened yesterday.


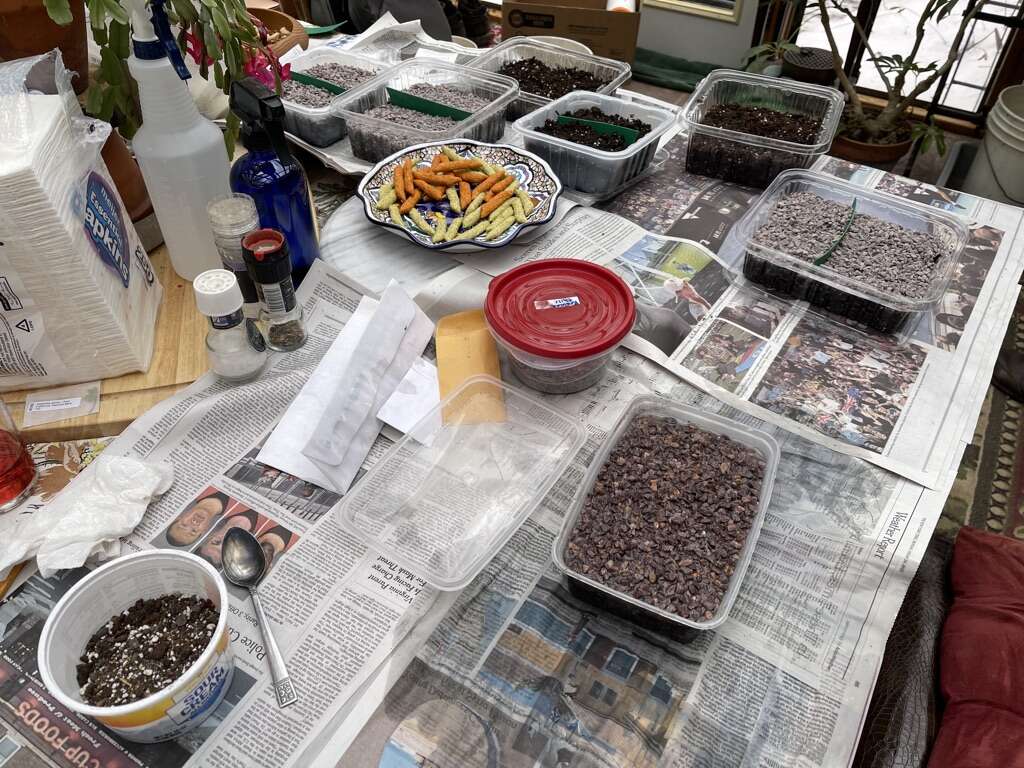
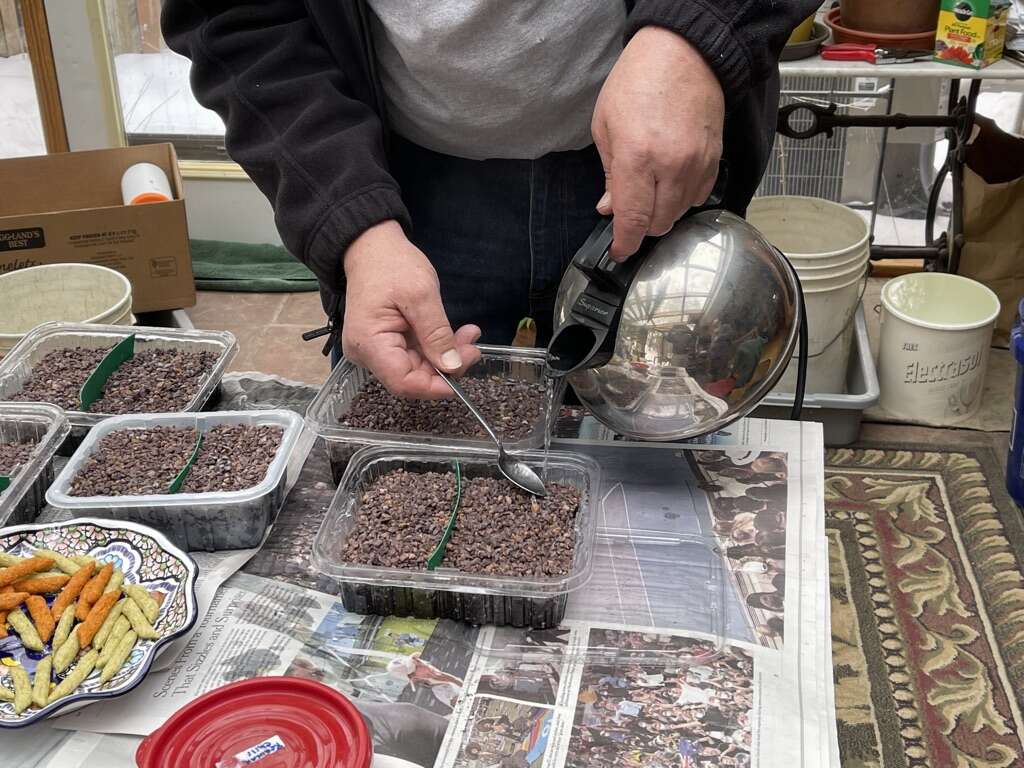
With Tony house being the halfway point and his sun-room an ideal venue for our project, we joined forces there.
Each of us had brought our own planting containers.  

We added  2-2.5” of wetted,  commercial potting mix into each container, lightly firmed down and leveled, and then top dressed with #3  crushed granite grit.


Boiling hot water was gently poured over the graveled covered potting-mix to sterilize the upper portion of the germination and growing-on area of each container.  
The containers that I had saved-up to use for this project were larger than need be, I decided to sow two different species of ferns into each container. Note the green plastic dividers.  The shape of containers isn’t important (Tony uses recycled cottage cheese or sour cream containers), what’s key is a transparent lid
.


After waiting several minutes for the gravel to cool off from sterilization, it was time to sow the fern spores.  Some of the sowing was straight forward. Some of the fern spores had already been shed from their sporangium and had collected in the bottom of the glassine envelopes as a fine black like flour.  All one need do is to tear open the envelope, remove the piece of fern leaf invert the envelope (open side facing downward) and gently tap out the fern spores. 

In the case where I had failed to pay attention when inserting a collected fern leaf into the envelope, ( I did not lay the leaf flat, but just quickly tucked it into the envelope and let the leaflets curl ), I removed the dried fern leaf and laid it onto of the damp gravel to allow the leaf to unfurl itself as it absorbed moisture raising up from the gravel (I’ll remove the leaf  after a day or two).

A dried section of a Northern Hart’s-tongue fern leaf was handled by simply scraping across the sori to shed the spores onto the gravel.


Using a permanent marker, Don & I wrote the names of the fern species and date onto the the outside of the lid, above each cell into which the corresponding fern spores were sown. I think Tony placed a plastic label with the corresponding info into each of his containers.
Once all of the fern spores were sown and the lids were secured, clean-up simply involved collecting markers, scrapers and spoons, and then gathered up everything that remained by rolling up the newspaper that covered the work table.  The “planted” containers go under lights and in a couple of weeks or so, they’ll have to be checked to see if the Prothallia are starting to form.  The indicator of this will be a greenish film or cast forming within the gravel.  At this point spraying the surface of the gravel with a mist bottle will be required in order to lay down a film of water which will allow the gametes to swim in and merge.  

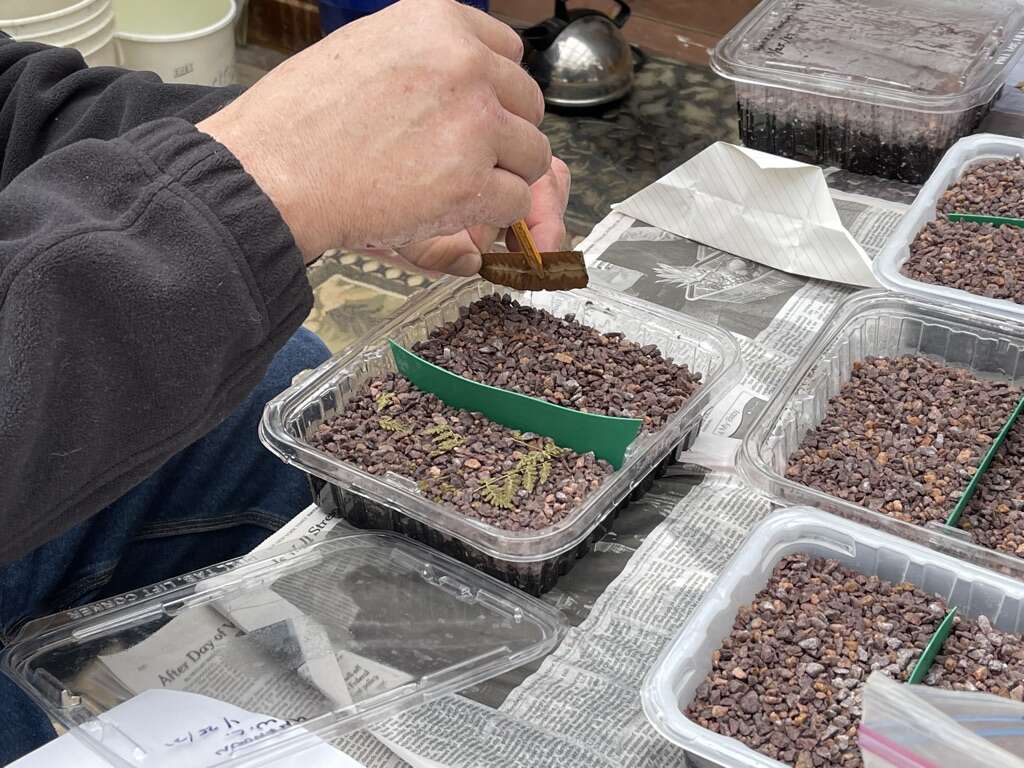
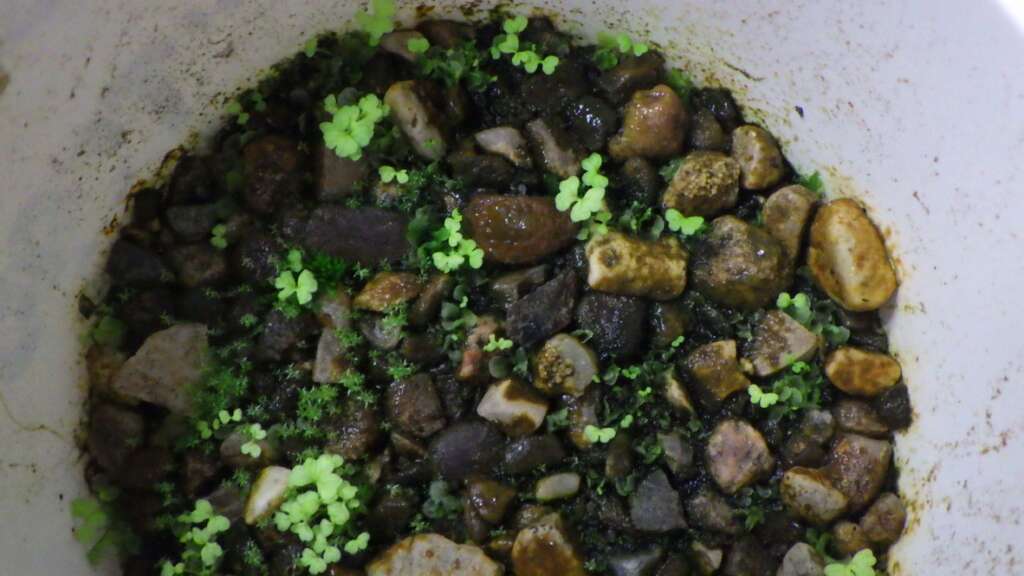
Tony had brought up the container (pictured above) that he’d sown spores into several weeks ago, of a Glade fern.  The pale green, multi leafed plants are the growing Sporephytes.  They  will grow on into young ferns.  The darker green, almost liverwort-looking plant growths (seen in the central area of the picture) are the mature prothallia or gametophytes, from which the gametes are released.  Or this is my best understanding of the process. There is  a good bit of moss growing in the container as well, but Tony says that at this stage, the soon-to-be young ferns, will be able to outpace the moss until it’s time to pot the  ferns up individually.  
All in all it was great to have a short get together and get a quickie chlophyll-fix in Tony’s sunroom!

All images courtesy of Tony Reznicek.

Leave a Reply

Your email address will not be published. Required fields are marked *