Bagged Conifers 2.5

Serious winter weather has been delayed at settling in here in SE Michigan, where I live. Good thing, as I had procrastinated in placing the protective shielding around all of the new Conifers added this year.   I take these extra measures to shield young plants from the sun and wind for their first winter (sometimes two), in this Zone 5a garden. The reason for doing so dates back months ago.  I removed my new treasures from their pots, and carefully teased away as much of the organic-based, potting medium from their root systems as I deemed safe.  While doing so, I untangle the root system and spread out the flare roots prior to planting into a much leaner, mineral-based soil mix that makes up my raised beds.  This opening-up of the root system does extend the period of time it takes for the recent additions to become fully established into their new homes.
What follows is a brief summary of what I do to help the (as yet), settled in plants cope with the changing seasons.  The process is pretty quick and easy to accomplish, does not require any specialized tools, and is inexpensive.
I start with the paper yard waste bags that are available at most hardware and garden centers.  I unfold a bag, open it up  (as if it’s to be filled), and cut off the bottom of the bag so that I’m left with a paper tube.  As I don’t care to look at the printed company logos all winter,  I turn the paper tube inside out.
Nearly all of the Conifers  I add to the garden are small so the full length of the paper tube isn’t needed.  I work one end of the paper tube down and inside the tube until it reaches the other end.  What results is a double-walled paper tube, that’s roughly 18” tall X 18” in diameter.  If more than 18” in height is needed,  I simply roll one edge down inside the tube until I’ve the height I need.
I  secure the paper tubes by pushing 3 bamboo stakes (usually evenly-spaced), around the plant, with the stakes in contact with the paper tube and the conifer centered within.  These paper tubes keep the winter sun and wind off my little plants, the paper holds up thru the winter weather, and very rarely have I had a tube blown off by the wind.  The open tops allow in all of the rain or snow, along with light, and do not trap too much heat on sunnier days.

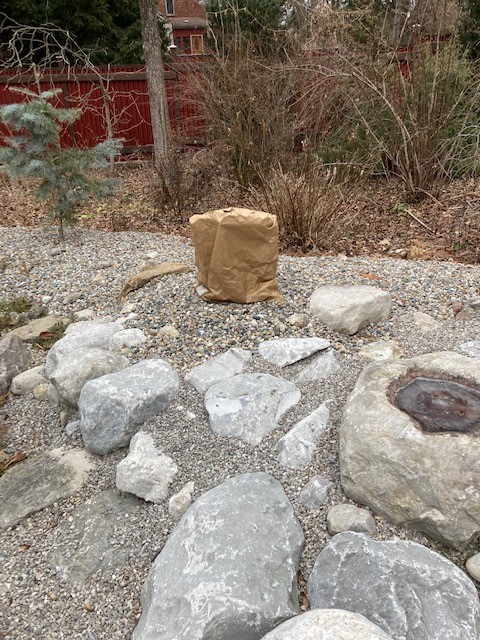
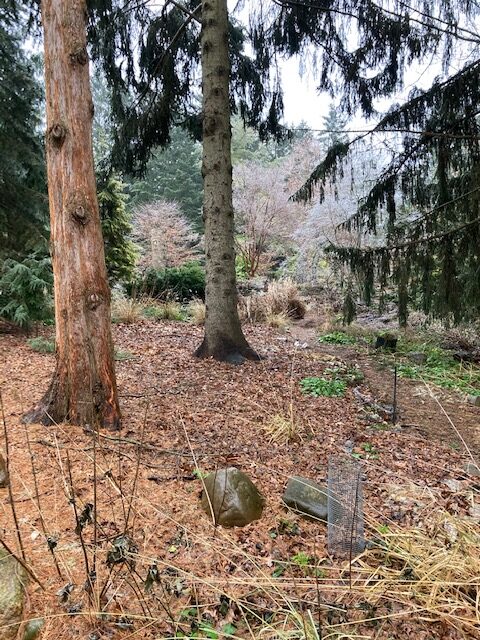
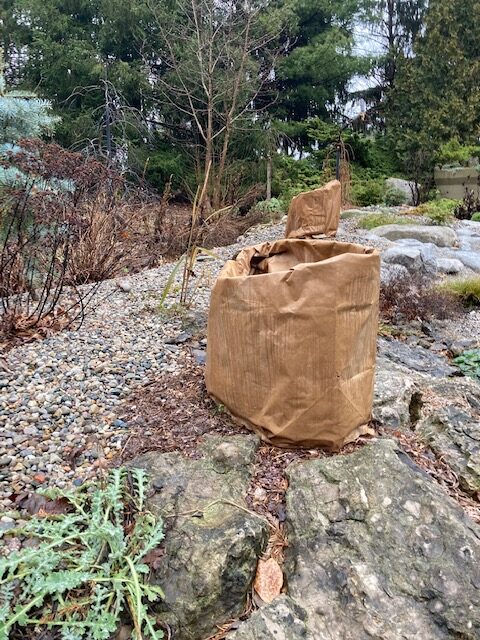
The above “Bagged” conifer is planted atop a raised bed with a full Southern exposure.  The protective tube shields it from the desiccating environment.  Un-bagged, the conifer would be in full sun as well as windswept all winter long.

To better secure the bag around the Pinus virginiana ‘Wate’s Golden Broom’ (that is planted on this exposed site), I drove each stake thru the lower end of the bag.

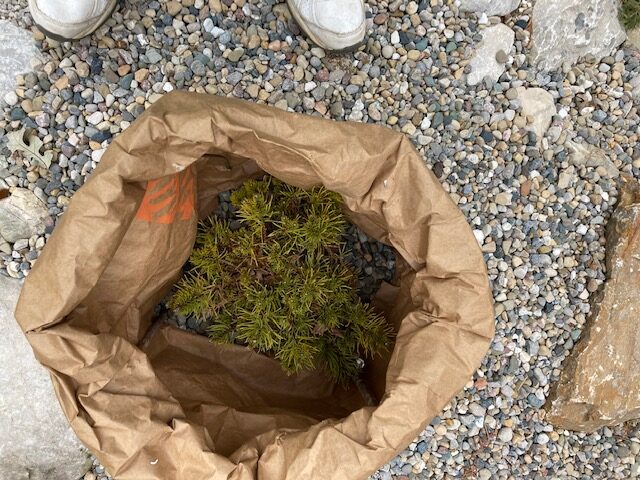
Then I simply roll the upper end down inside and tuck the top of the stakes under the rolled, lip-edge of the tube.

The rock-work of this bed makes staging the stakes evenly around the conifer impossible.  I work the stakes in (where possible), and the effect is the same.

I roll the North side of the bags down farther than the South side. Doing so keeps the lower angled winter sun from striking the inside of the bag on its North side, preventing heat build-up inside the bag.

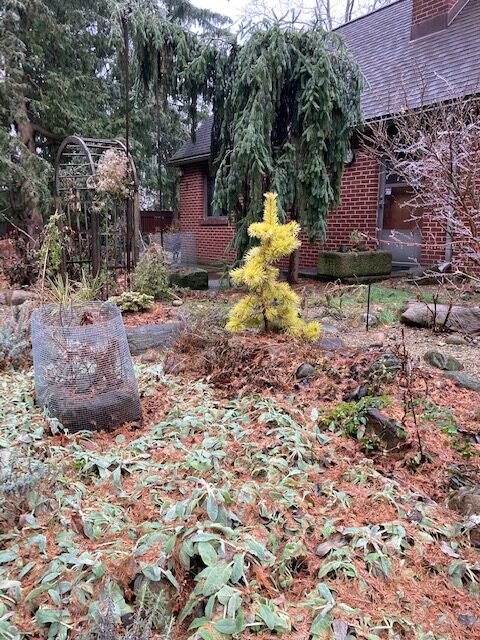
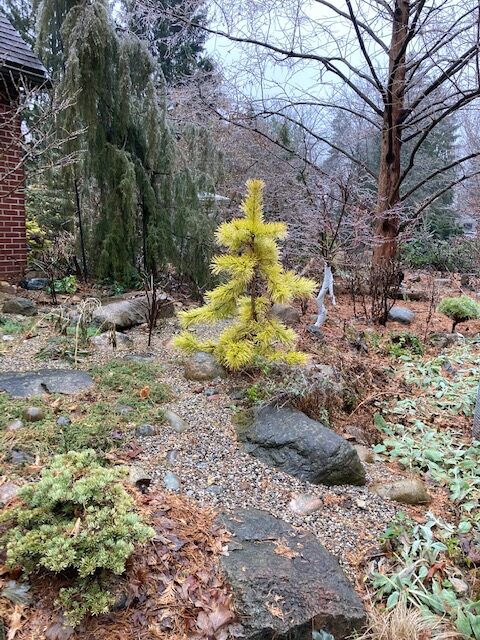
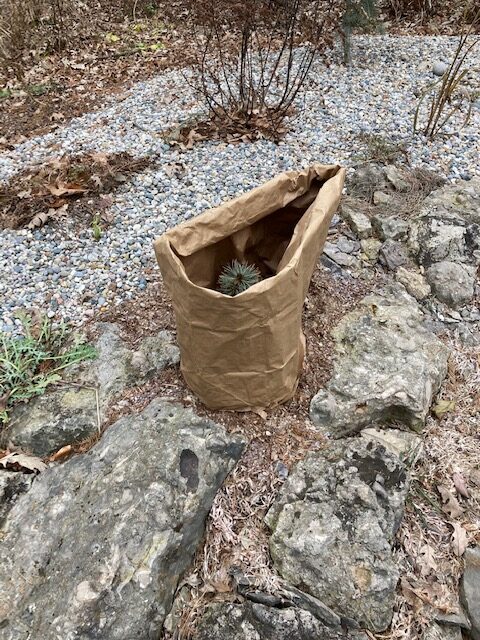
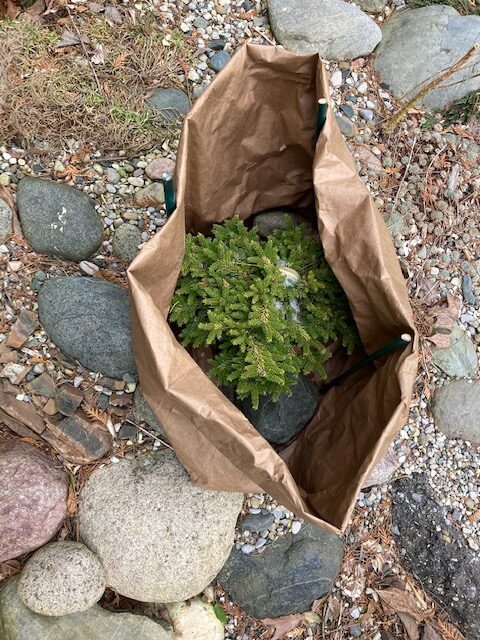
For conifers of unproven hardiness (in my garden), such as this Chamaecyparis lawsoniana ‘Filip’s Golden Tears’, I will “Bag” them for an additional year or even two, until the plant has grown on to attain a larger caliper before it’s subjected to a winter without shielding it.

Yet another “Bagged” conifer.

Snug as a Bug, and waiting for Spring!

Jacques

A Winter Project

While winter has the garden locked in its icy grip, it’s time to pursue other activities.

The property that surrounds our home (when we purchased it over 3 decades ago), has evolved from the yard that we started with into a garden. As the garden developed and matured over the ensuing years, it has become a home and refuge to countless others. Like many gardeners, we relish this opportunity to share our haven with most of the co-resident wildlife here. As the diversity of the plant life expanded within the variety of micro-habitats we created, so too did the variety and numbers of our fellow creatures.

No other group brings such animated life to our garden as do the birds. Getting them thru a Michigan winter requires assistance beyond creating this sheltered space. As a life-long feeder of wild birds, I’ve learned that the greatest variety of foods offered yields the greatest variety of birds. When the weather turns bitterly cold (as it is now), the preferred food choice for many of the birds is shelled peanuts.

For a couple of years now, I’ve been trying various styles of homemade feeders that I intended to be used solely by birds, however, resident squirrels have other ideas on the matter. It’s not that I mind the 3 or 4 different species of squirrels here, getting the sustenance they need in order to survive. I place peanuts on the platform feeders and onto the ground for their indulgence. But it’s been a battle of wills keeping certain furry individuals in their proper place.

What follows is an abbreviated instruction for assembling the latest (and for the past 2 weeks now) squirrel-baffling peanut feeder that I’m using. And it was crazy-inexpensive to make as well.

Supplies

  • An empty plastic peanut butter jar w/lid
  • A piece of 2” plastic pipe, (on my first try, using 1 1/2” pipe the saddle sat too low on the floor of the jar).
  • Fine galvanized wire
  • Fender washer 
  • Tools
  • Dremel tool w/ cutting and grinding heads
  • Coarse file
  • Hand-held propane torch
  • Pliers
  • Scrap piece of 1” copper pipe
Jar and pipe

A peanut butter jar and a scrap piece of 2” pipe.  From the length of the 2” pipe I cut off roughly a 5″ piece, however before I remove the piece I need, I first make 2 parallel cuts about .75” apart, running the length of the piece of pipe I’ll need (roughly 5”). Then make the perpendicular cut across the pipe to remove the 5″ piece. What you should have is a length of pipe with a 3/4”- 1” slot; remove the length of the pipe (the blank).

This blank, with repeated trial fittings and recutting, grinding, filing, will become the saddle that will sit, centered in the bottom of the plastic jar. Its purpose is to deflect the peanuts towards the feeding openings in the jar. Now the fun starts!

With the blank resting on the cut-out slot along the bottom, I’ll set the empty plastic jar in front of and centered with the side of the blank, so that when I bend down and am eye-level with the blank, I can look at the base of the jar, and see where on the blank I’ll need to mark the lines that will indicate the tapered inside walls of the jar. Then I set the jar, on top of and centered, on the blank so I can eye-ball and mark the top sides of the blank indicating where it will meet the inside of the jar. Next, I cut the blank along the lines and file it, then try a dry-fit of the blank inside the bottom of the jar. It never has fit the first time, so I eye-ball where further filing needs to be done. This process takes several tries until the fit is correct. I remove the ill-fitting blank, refile, try another fit, see what needs to be filed, remove and repeat until it fits. The finished saddle should sit centered in the bottom of the jar (without distorting the thin plastic walls of the jar).  

Next, remove the blank from the jar and set it on the work surface. Looking straight down on it, make an arching half-circle line on each side of the blank, so the top of each arch is in the midpoint (length-wise) and roughly 3/4” apart (see finished saddle). When the arching lines reach the mid-line of the blank, I continue the line straight down to the bottom of the blank.  Cut out the insides of the lines and file the blank smooth.

Upside-down saddle

This is how the finished saddle should look. I laid it upside-down so that you can get a better look at the underside, I failed to take a profile image to show how the ends are tapered from top to bottom (my bad).

Saddle in jar

Above, this is how the finished saddle looks after its placed inside the jar.

With the finished saddle in place, I light the propane torch and heat up a scrap piece of 1” copper pipe (I used a 1” copper union), held with pliers. The heated copper union is then lined up with the center of the end of the saddle. My aim is to have to bottom of the opening that I am about to make be at least 1/2” above the floor of the jar. Once I’ve got the proper alignment, I push the hot copper pipe thru the plastic while thrusting the copper slightly back and forth, to make the feeding holes on each side of the feeder.

Filled feeder

Here’s what it looks like when filled with peanuts.  Note the feeding hole is approx. 1/2” off the floor of the jar; this keeps enough peanuts in place (at the lip of the hole), and prevents the peanuts behind from tumbling out the holes.  Also, note the smaller hole beneath the feeding hole.  It’s made by heating up a piece of heavy wire and poking it thru on each side.  I’ll run a cut piece of wire thru both of these tiny holes, and thru the jar, extending out roughly 1.5” on each end.  This wire acts as a training perch until the birds figure out what’s what. Once they figure out how to reach their prize, I remove the wire so that larger birds can’t use it.  All of the smaller birds simply grasp the bottom lip edge of the feeding hole, grab a peanut, and go!

Underside view

I drilled out a center hole thru the lid, run a length of fine galvanized wire thru the hole, and thru some washers, tie it to a nut and I’m done.  Oh, I also file down a raised line of plastic that borders the top side of the lid, to prevent it from being used as a possible toehold by determined squirrels.

Ready for customers

Here’s a finished feeder, hung less than 12” outside my bedroom window where the previously, squirrel-vandalized, peanut feeder was hung.  The perching wire’s been removed as the birds have been using this feeder for two weeks now. Not a single squirrel has breached this feeder and not without repeated attempts!

Watching the parade of Chickadees, Titmice, Nut-hatches, smaller woodpeckers, and the like visit this feeder has added endless hours of enjoyment, especially during this Covid winter!

I hope you are enjoying your co-residents as well.

Jacques

Unwinter

Jacques ThompsonDec 18, 2021, 1:06 PM

At the risk of tempting fate, I’ll utter it out loud, “This hasn’t been much of a winter so far”!  Despite a forecast to the contrary, we’ve been missed by the snow (again), as temps remain mild. So here are several pics snapped while taking our “Girls” out for a loop thru the garden.

Cornus florida ‘Red Pygmy’ along the North side of the garage.

Abies concolor, on the path towards the SW corner of the property.

Having already walked the length of the West fence line (nothing worthy photo-wise there), and turned the NW corner heading East as we exit the windbreak of Norway Spruce and White Pine planted there, with Gema leading the way.

Fagus sylvatica ‘Horizontalis’ at the NW area of the pond.

I snapped this pic just to see how much detail would come out (looking SE); pond behind and to the right.

Pinus contorta ‘Chief Joseph’ in front of the house.

Clematis verticillata in seed on the arbor.

A  trio of some of my most favored conifers, Abies concolor ‘Blue Sapphire’, Abies concolor ‘Chief Joseph’ and Juniperus formosana, lower left, center, and upper left respectively.

Up & Down Weather

From Jacques Thompson, 12 December 2021

So yesterday we had a front blow thru (which thankfully we were on the warm side of), that left behind 1.25” of rainfall, and the 55-60 mph wind gusts made quick work of undoing all of the leaf-blowing and gutter-cleaning I’d done just a day prior. 

An intermittent stream

The lower garden had a brief stream-visit, enough to keep us from crossing to walk out in the tree farm behind us. But as there is no frost in the ground (as yet), the water quickly soaks into the ground (once it stops running). 

Our Stream, dubbed “Ever-So-Often”, comes in from the SW.

he stream in the South

And exits thru our Gate on the North.  My solid fence (seen on the left), is constructed using panels of Ondura roof panels.  The solid fence transitions to wire, as the low area with its intermittent flowing water, would carry away the solid panels. All of the flotsam will need to be collected and placed into one of the beds.  Some of the floodwater still lingers, visible thru the Norway Spruce branches on the other side of the fence, upper right. 

The raised area on which Andrea is standing was created when the pond was excavated. The removed soil was bermed up around the pond to keep soil-laden flood water (of the intermittent stream) out of the pond.  Our pond now occupies the site of what was once called “Lake Ever-So-Often”, as this naturally low area often flooded. The bermed-up sides of the pond are high enough to divert the flow around the pond – well usually. On two occasions in the past, the excess volume of flowing water was great enough to crest over the berm!  As what remains of the latest, train-load of crushed gravel is still sitting out on my neighbor’s property, and the only route I have to transport the gravel to where it is needed is up and over this section of the berm, this narrow section will be the last of the graveled areas to be completed.

 Tomorrow I’ll be back to rake up the mess and blow debris off the gravel paths.

Winter’s Coming

Jacques Thompson Oct 25, 2021, 5:47 PM

The weatherman said we were in for 2.5-3” of rain, starting around noon today and running thru Monday evening. That gave me the needed window to get the last of the gravel I needed to move in order to finish-up the latest path conversion.  I’d formed-up and poured the 2 transition steps between the gravel pathway where it merged to grass paths, and I needed additional gravel  in order to raise up the gravel path and bring it even with the top of both transition steps.


While making trips back and forth to the gravel pile (out in the Nursery) and the newly converted path, I noticed things were coloring up and going past so I snapped a few pics with Andrea’s phone.

The native Cornus were the first to show some color.  This year they were loaded with fruit, and the Robins made quick work of the bounty.  The dwindling gravel pile is just visible out in the nursery in the upper right of this pic.

The Sugar Maples starting to color-up

Amur Maples as well

The return trip with a wheelbarrow of gravel.

Anemone japonica ‘Honorine Jobert’ still going strong.  These are growing in the bed atop of the stone wall that’s pictured in the previous pic center-left.

A seedling coneflower growing out of golden-needled, low-growing Juniper, J. conferta ‘All Gold’.

Moving farther along toward the job site, the paw paw are yellowing-up.

Looking to the left from the previous shot, the Aconites are finally coming into bloom.

One of two dwarf witch-hazels ’Little Susie’ in full flower, though out of focus; my bad!
The load of gravel dumped (still further on). I return for another load.

The falling mist brightens the wet foliage of these Heucheras. I added to this bed earlier this year.

Looking up from the coral bells is another view of the Paw Paws.

Some pass-along mum from who-know’s-where.

I swear this Bowman’s Root looked better than it does in this pic.

Always liked these Sedums, remind me of my mom who grew them in her beds.

A Dysosma from Chen Yi that runs far and wide. This form has the palest-pink blooms; Disporum flavum foliage in the background.  The Rhody is ‘Ken Jannick’. I purchased it as it is touted as being more tolerant of alkaline conditions, and it is quite happy in my garden (unlike most Rhodies)!

After I’d hauled all the gravel I needed (for this year), I collected my tools and forms (that I removed from the transition steps), textured the top-side of the steps by hammering with the claw-end of a hammer  and headed up to the house in the rain.  No Pics of new steps as they were recovered with wet towels and then dry-leaves enveloped in a tarp (to keep the leaves dry). Covered the curing steps to protect from frosty night-time temps.

I’ve already got next year’s gravel project waiting for me.

Thankfully some thoughtful soul had paid to dispose of these pavers at the Township recycle center (where I worked). Next year I’ll have a paved area for this table & chairs, after I’ve hauled in the gravel to cover this area.

Allium thunbergerii in a trough.  A very late flowering allium and only 8-9” tall.

I’m so glad I got outside early yesterday morning and got the last of the gravel hauled to finish up my last path project (for this year).  I took the dogs for a loop around the garden while the rain has paused to find this. 

I won’t be hauling anything thru here anytime soon.

The rain gage reads 3.0” so far!